Showing posts with label Refurbishing. Show all posts

Thursday, August 18, 2011

A D.I. Vase Thingy

I bought this little vase thingy at DI for a dollar, and it was white, and kinda ugly. So I spray painted it red, added some raffia and bought a cute bird to set in it like a nest! It now resides in my living room! I also did some product photography and used it as one of my props:)


Fathers Day...a little late

For Fathers Day I did some cute bottles full of all my hubby's favorite treats! Then that same week, I made one for my brother's 30th birthday! Such a fun little way to make someone feel special, even the fella's. I got my free printables for this from another blogger, who I cannot find anymore:( So if you know who did this, let me know cause I would love to give them credit! :) Very cute idea, and even cuter with the retro labels!


Sunday, December 12, 2010

A twin for my cedar chest!

I went visiting teaching last week, and I received a blessing...
All of a sudden, Leslie said "Hey I have this chair...do you want it?" And I was like "Oh my gosh! This is a blessing for coming to visit teach!!" I LOVE this chair! And I was hesitant to even do anything to it, cause it was already so dang cute! BUT, I have been wanting to balance out my living room....so I made it a twin to my cedar chest:)
Just painted it, getting ready to glaze and seal it.
And here it is now!:

I know it is a drastic change from what it was before...and I love both looks! But, this matches my room better...AND I can use it as a new photography prop! Bonus!!


Wednesday, December 8, 2010

Bad memory to Good memory

I know a man who made this in high school. That man is a BAD man, and since I always thought this was ugly, I decided to refurbish it and make it into a good memory...and a cute piece of furniture!
Here is the ugly wood, and the bad memory...

And here is the cute new memory! It's now a piece of cute furniture for my boys' room!


Thursday, December 2, 2010

Gotta Love a RED CHAIR!

Ready to have a makeover!

I have been searching for a chair that I could paint red to use for my photography, and I found this little Thrift Shop and went in and saw this simple wooden chair for $5! I bought it, and carried it out to my car where my husband was waiting...when I opened up the back to stick it in my car, my husband just rolled his eyes at my new treasure:)Anyway, here it is in action! Look at that cute bundle on top of it! ADORABLE!


Wednesday, December 1, 2010

Just an after...


Dang it! I can't find the before picture to this big vase anywhere! But here is the after shot of it at least. About a month ago I re-decorated my bathroom with blue and brown. This vase was hideous. It was black with gold accents. So I spray painted it turquoise and then glazed it with my fav glaze, and it looks soooo much better now! If I ever find the before pic, I will post it so you can see the transformation:)

Sunday, November 28, 2010

Once was old, now is new...


I wish I would have remembered to take a before picture of this...but I remembered to take one just after I had primed it. So, just imagine the ugliest color of wood...and that was it. So, the top picture is the white primer...But anyway, here is what it looks like now!:

Huge improvement if you ask me! I love this sage green color. It is actually the same paint I used on my front door and the accent color on the exterior of my house.
So, if you are wondering how to refinish something of your own, here is the rundown of what I did:
1.Prime it! Use and OIL BASED primer- I used Kilz Original- found at Home Depot.
2.Paint it! Any color you like!:)
3.Paint it again! Only if you think it needs a second coat though...if you like the way it looks, more power to ya!
4.Glaze it! This was my first time using the glaze, and I totally LOVE it! I used Ralph Lauren Faux Technique Glaze, tinted Tobacco. You get it at Home Depot, but make sure to ask them to tint it for you! Then just brush it on, and really get it into the cracks, and then wipe the excess off with a rag. This is by far my favorite step, cause you can get really artsy with it. It totally changes the piece!
5.Seal it! I used a high gloss sealant- Minwax Polyurithane. This stuff stinks. Just FYI.
6. Let it dry and you are done!

P.S. Let each coat/step DRY COMPLETELY before you apply the next. I learned this the hard way. I was so excited to get my glaze on...cause it's my fav step...and when I started rubbing the excess glaze off with my towel, it rubbed off some of my paint job too! Lesson learned.


Saturday, November 13, 2010

Cedar Chest Makeover!

I have had this old cedar chest for a few years now. I bought it at the DI for like $50, and said that I was going to give it a makeover...well, four years later....I did! I'm not gonna lie. I'm kind of conservative...so this was a huge change for me and when I painted it yellow, it was YELLOW. Like canary yellow. I about cried, cause I hated it. Then the next day I was gonna paint over it and decided to just glaze it with my Ralph Lauren faux technique glaze, and I totally LOVED it! So I learned my lesson- don't give up before you see the whole project done! Then you can always paint over it if you hate it. Anyway, here is the BEFORE:
And the AFTER:

After glazing it, I reupholstered the cushion with some (not very conservative) chocolate and white polka dot fabric. And I was a little apprehensive about that, but I totally love it!! I think every room needs a "statement piece" and this is totally it!:)


Monday, May 24, 2010

Stepstool Makeover!

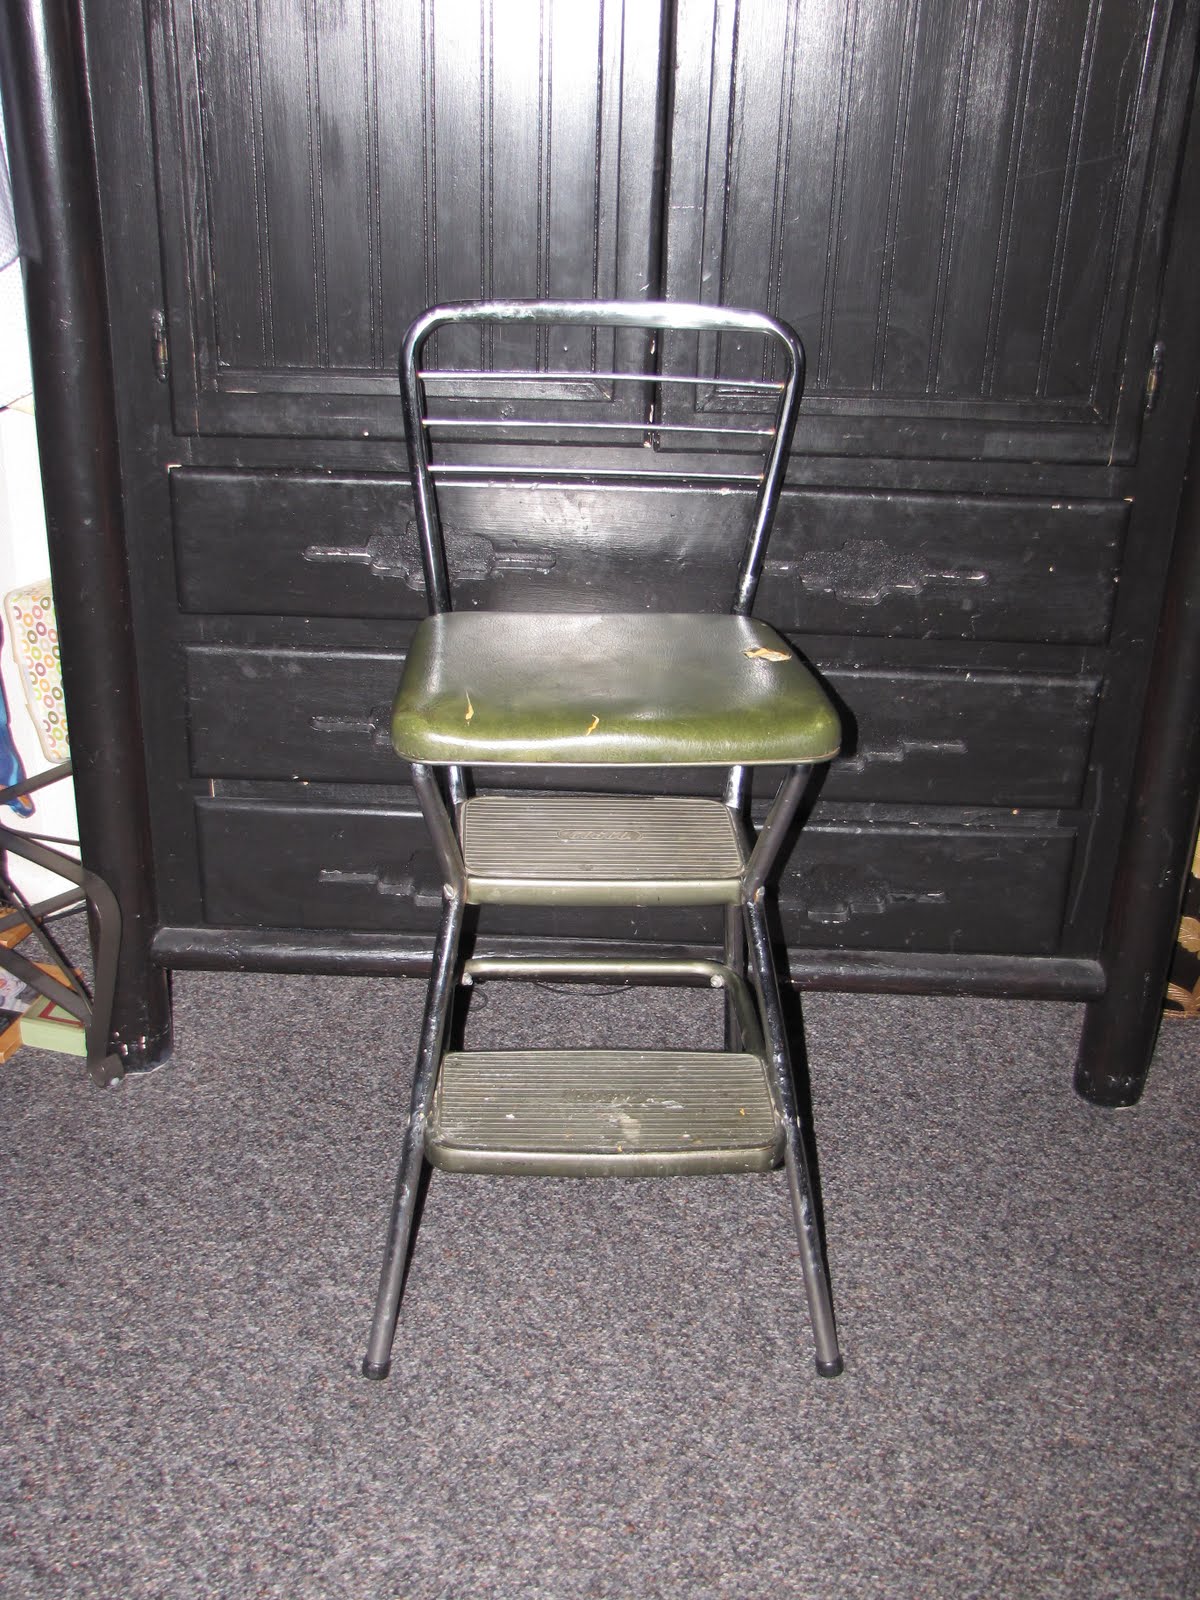
(My little boy couldn't understand why I was taking a picture of an empty chair, so he went ahead and sat on it for me. How sweet he is!:) We got this retro stepstool a while ago at the DI, and have been using it as my little boy's high chair- with a booster seat on top of it. But now it is too high for our new kitchen table. So I took the booster off, only to remember that it looked like this underneath!:


Sick, huh?
So I got out some of my favorite fabric, and reupholstered it! I also gave it a major cleaning, cause if you have kids, you know that where they eat is probably the messiest place ever! So here it is before:


And here it is after!:
Major improvement!


Thursday, January 14, 2010

12 months baby picture frame

Obviously I haven't finished this, but I love the idea of it. I love looking at it and seeing how much my baby boy changed each month during his first year. I still need to fill in a few months though!:) But I changed this frame up a bit. It was a baby blue color, and it didn't match his room, so I mod podged some scrapbook paper onto it, touched it up with paint, and now it matches his fisherman room perfectly!:)


Saturday, November 14, 2009

My thumb ain't green.

I got my husband this herb kit for Christmas last year. I even cut out vinyl with each of the herbs names to stick on the pots. Super cute, right? (We were both really excited about it at the time.) Well, I think we both suck at watering them, or making them grow, cause they didn't. I mean, they sprouted, but then we didn't know what to do with them. Oh, you cook with these things?? Ya, didn't do that. So, they died. And a piece of my heart died with it. So, I dug up these herbs...or what was left of them, and threw them away. Then I got some florist foam from the dollar store, and stuck it in the bottom of the pots. And I just shoved some artificial plants in there. And now it looks like I am oh so green, and grow my own plants. Ha!And this is the finished "fake out" herb arrangement. I put some artificial yellow pears by them too, just for a pop of color. And I must say, this is a major improvement to my dead window sill display before.


Friday, March 13, 2009

Bedroom Decor!

I bought some "accent fabric" for my fall colored bedroom and recovered the bench on my cedar chest, and also made a neckroll pillow complete with tassels to put on my bed!


This is a chandelier style hook that I hung all my neckalces and braclettes on! It really does look like a little jewelry chandelier!
And finally, I put this above my closet, so that I can see it before I fall asleep each night. It is an excellent reminder! Sometimes I accidentally look up at it, and then remember that I need to Pray!:)

Collage Frame Makeover!


I got this old ugly collage frame at the DI for $4! Another...steal! I told my husband I only bought it for all the pictures of that hot 80's model, though:) It was missing some of the glass, and it had chips and scratches all over it, so what did I do?? MAKEOVER!! And I always catch myself going with really neutral colors, so this time I headed out to the "Re-Store" (home improvement outlet), and got some fun paints! I got them for 50cents a pint!! Wow! I got some other killer deals there too, but I will tell ya'll about those later.
BEFORE

AFTER!! Since it was missing glass, I painted some stars with a dusty light pink color and tied them in the slots that I couldn't put pictures in. I also had these 5x7 pictures of my little guy that I had taken so I popped those in there, and I love how it turned out!:)
Total cost: $5!!